Before we start mixing into stuff, we need to point Fabric to a mixins file that will contain mixins that we want Fabric to load.
This guide will assume you are using IntelliJ and you have the Minecraft Development plugin installed as it will make your life MUCH easier
1. Creating a mixins file
First we will create the file which will contain the mixins that we want Fabric to load, in src/main/resources you want to create a filed called <modid>.mixins.json with the following contents, so for the example mod this file will be src/main/resources/examplemod.mixins.json
{
  "required": true,
  "minVersion": "0.8",
  "package": "net.danygames2014.examplemod.mixin",
  "compatibilityLevel": "JAVA_17",
  "mixins": [
  ],
  "server": [
  ],
  "client": [
  ],
  "injectors": {
    "defaultRequire": 1
  }
}
Let’s break this down a bit
package - This points Fabric to the package in which your mixin classes will be located, in this case it points to the src/main/java/net/danygames2014/examplemod/mixin directory
mixins - Mixins that will apply on both client & server
client - Mixins that will apply only on client
server - Mixins that will apply only on server
required - If this is set to true and a mixin in this file fails, the game will crash
minVersion - This specifies the minimum version of Mixins we require, at the time of writing that is 0.8.7
compatibilityLevel - This controls the minimum java version our mixins should be compatible with
injectors - Specifying default settings for the injectors
defaultRequire - Sets the require parameter on all injections to 1, this means that if a mixin fails to apply, it will crash the game with a mixin injection error
The mixins json file can have any name you want, however its usually named
<modid>.mixins.jsonfor easier identifiability and consistence
2. Pointing Fabric to our Mixin file
In our fabric.mod.json under src/main/resources we will need to add a a new entry where we can specify out mixin json (or mulriple jsons), navigate to this file and and add a new array with the key mixins like this.
src/main/resources/fabric.mod.json
"mixins": [
  "examplemod.mixins.json"
]
Make sure to replace the mixins filename with what you named your mixin file.
3. Creating our first Mixin
We are now ready to create our first mixin, head to the mixin package you defined earlier, in the case of the example mod its src/main/java/net/danygames2014/examplemod/mixin and create a new class for your mixin.
Mixin classes are usually named after the class that you are mixing into, so a mixin into
PlayerEntitywould carry the namePlayerEntityMixin. However this is not a requirement.
As an example I will be creating a mixin into the PlayerEntity, notice the @Mixin annotation with the target class in parenthesis.
@Mixin(PlayerEntity.class)
public class PlayerEntityMixin {

}
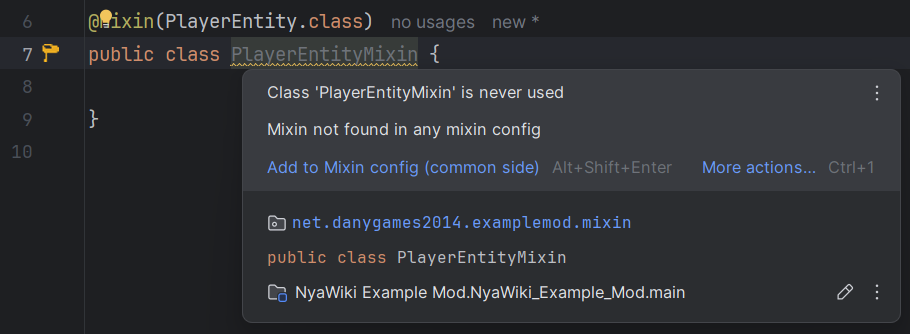
Now we need to add this mixin into our mixins json, Minecraft Development will even warn us about this and will offer a quick solution

In the context actions you will be able to select Add to Mixin config and the minecraft development plugin will automagically add it to the mixins json

After selecting the option, a new line will appear in the mixins json that will have the name of our mixin class relative to the mixin package. You can ofcourse do this manually, but why bother :p If you are mixing into a client or server only class, Minecraft Development will put it under the correct entry.
{
  "package": "net.danygames2014.examplemod.mixin",
  "mixins": [
+    "PlayerEntityMixin"
  ],
  "server": [
  ],
  "client": [
  ]
}
(Some non-relevant lines are ommited)
4. Injecting into the target
Our Mixin is now created and registered and we can start injecting into the target class, the individual injector types will be explained in later articles. For now I will just use a simple @Inject as an example. An mixin injector is a method annotated with an appropriate injector annotation. When making the injector, we will be using the minecraft development plugin and its suggestions heavily in order to preserve atleast some sanity :)
We start with a simple void method with an fitting name
public void explodeOnImpact(){

}
Now we annotate it with the injector we want, in this case we will be using @Inject which requires the targetted method and injection point to be specified.
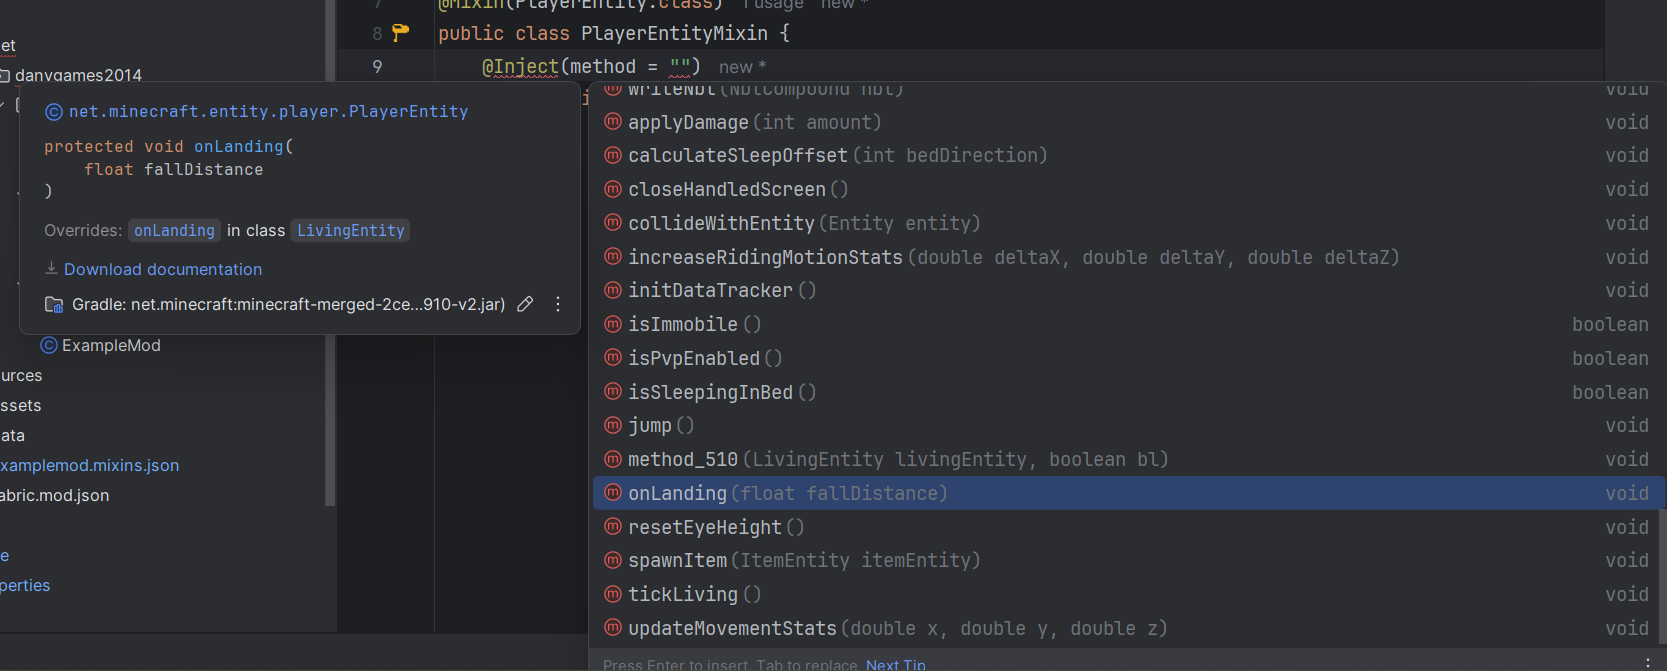
The targetted method is specified using the method String parameter, once you write method = "" and have your caret in the open brackets, McDev plugin should start hinting all the avalible methods you can choose from. If that doesnt appear, hit the key combination you have assigned to Main Menu/Code/Code Completion/Basic, by default that’s Ctrl+Space

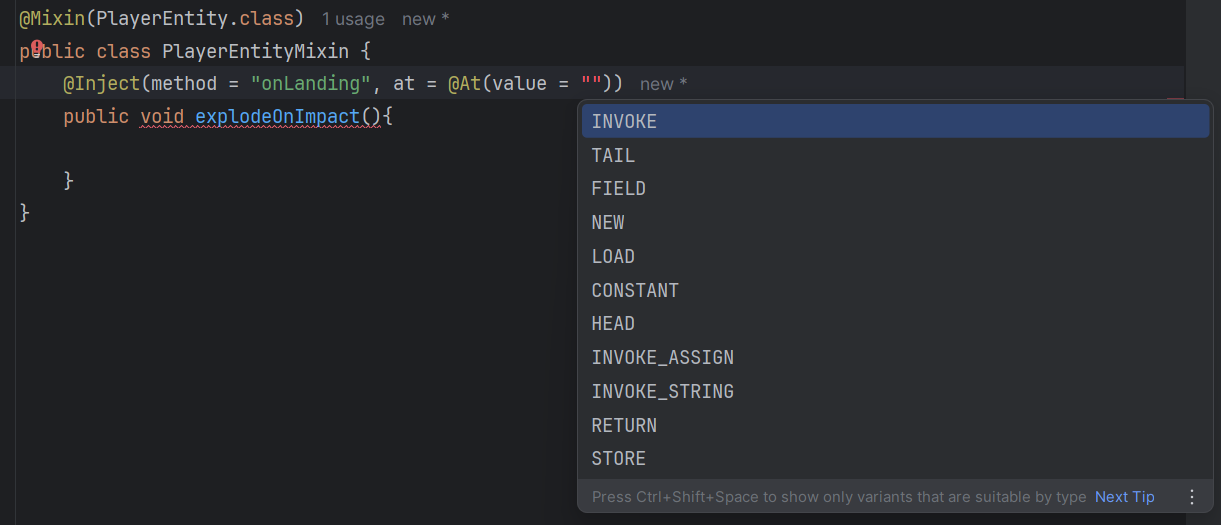
Now we need to define the injection target using the at parameter, which takes in an @At annotation with parameters as input. I want to inject after the stat is increased. So I will inject after increaseStat method invoke.
McDev will hint you throughout the entire process
 once i choose
 INVOKE, it will automatically create the target parameter and start hinting on it, here I can choose the method I am after

Now that we have correctly specified our target, McDev will complain that the method signature is incorrect, simpley hover over the error, or use the context options and select Fix method signature

Our mixin class will now look like this
@Mixin(PlayerEntity.class)
public class PlayerEntityMixin {
    @Inject(method = "onLanding", at = @At(value = "INVOKE", target = "Lnet/minecraft/entity/player/PlayerEntity;increaseStat(Lnet/minecraft/stat/Stat;I)V", shift = At.Shift.AFTER))
    public void explodeOnImpact(float fallDistance, CallbackInfo ci){

    }
}
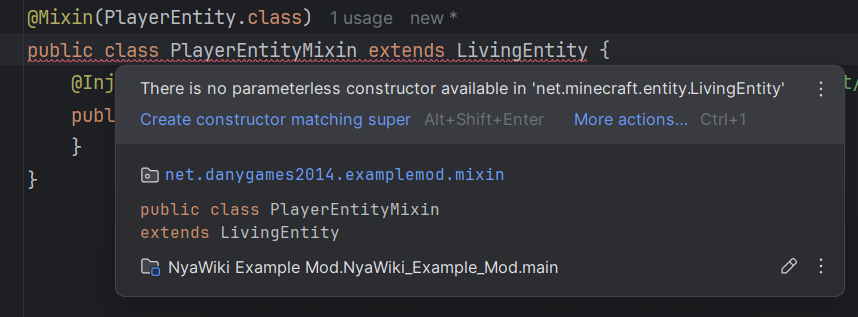
We can now add our mixin logic, I want to create an explosion on impact if the player is crouching, for that I need to access the method isSneaking() which is inherited, so we need to check which class the class we are targetting extends from and inherit the same class in our mixin. In This case its LivingEntity so we will extend that.

IntelliJ will complain that we need to create a matching super constructor, so we just hit Create constructor matching super in the hover tooltip or in context options


Now we can access the methods and fields from the class our targets inherits from and our resulting class with the implemented logic will look like this
@Mixin(PlayerEntity.class)
public class PlayerEntityMixin extends LivingEntity {
    public PlayerEntityMixin(World world) {
        super(world);
    }

    @Inject(method = "onLanding", at = @At(value = "INVOKE", target = "Lnet/minecraft/entity/player/PlayerEntity;increaseStat(Lnet/minecraft/stat/Stat;I)V", shift = At.Shift.AFTER))
    public void explodeOnImpact(float fallDistance, CallbackInfo ci) {
        if (this.isSneaking()) {
            this.world.createExplosion(null, this.x, this.y, this.z, 2F);
        }
    }
}